
Natalya Stansfield was chosen as the lucky winner of ParentMap’s “Dream Nursery Makeover Giveaway” this summer, netting an amazing package of services and products to transform a spare bedroom in her home into an adorable nursery for her newborn daughter Camila. Included in her package, valued at $3,000, were organizing and space planning services by Innovatively Organized, a custom closet solution and installation by Organized Spaces, organizing bins and products from Storables, and a one-of-a-kind piece of wall art created by Michelle Doran Creative Services.
 |
 |
The nursery makeover began with two organizing consultants from Innovatively Organized arriving at Natalya’s home to tour her space and discuss the family’s needs. The Stansfields recently welcomed their third child to the family, a beautiful daughter they named Camila. None of their children had ever had a dedicated nursery and, consequently, Camila’s belongings were stored in various rooms around the house. The team from Innovatively Organized wanted to make sure all of Camila’s items had specific locations within the new nursery, rather than across her parents’ room, older brothers’ rooms, and downstairs, in order to help her family find everything more easily.
After this initial consultation, and armed with a better understanding of the space and the family’s specific needs, the organizing team got right to work planning Camila’s nursery. The professional organizers designed a custom space plan for the room — including product recommendations and color scheme suggestions — which were shared with Natayla and her husband Clayton for approval. Once the space plan was given the green light, the professional organizers from Innovatively Organized went shopping for new products while coordinating with the other contest vendors, Organized Spaces and Michelle Doran Creative Services.
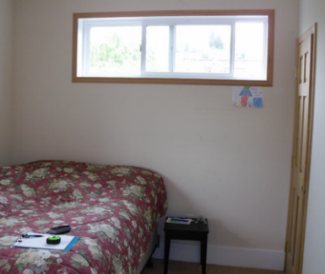
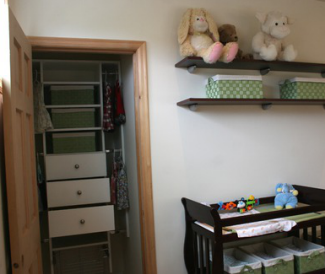
 A custom closet was donated and installed by Organized Spaces; several new wall shelves were also installed in the nursery. The professional organizer team of Alisa and Jackie set up the room according to the proposed space plan, installing Storables-furnished color-coordinated bins for the closet, shelves, and Camila’s changing table, as well as under-crib storage containers and a bookshelf for Camila’s books and soothing sound machine. ParentMap generously donated new bedding, a floor lamp, and a curtain for Camila’s nursery. Once Camila’s furniture and belongings were organized, the team hung the adorable wall art featuring Camila’s name (Camila Amber), created by Michelle Doran Creative Services, as a decorative and welcoming addition to the nursery.
Contest winner, Natalya and her family loved the finished nursery makeover! Natalya especially enjoyed the custom artwork of her daughter’s name hanging on the wall, and one of her sons was bouncing around excitedly in the new room. Even baby Camila was excited, taking in her brand new nursery that she can now call home! We are excited for the family to now have an organized nursery for Camila, as it will help reduce some of the stress and demands of caring for a new baby in the home. Camila’s clothes and belongings are stored neatly, making it simple for her parents to find items easily and quickly. Plus, the custom closet was designed intentionally to grow with Camila — as she gets older, the bins and compartments can be rearranged to hold her toys, clothes, and other items. Welcome home, Camila!
View the Innovatively Organized Facebook page for before and after photos of the entire project!
5 Organizing Tips for Your Nursery
For those of you with your own nursery to outfit, here are some of our tips for maintaining an organized space:
- When you’re up with your baby in the middle of the night, you’ll want to have everything you need within easy reach. Stand in front of the changing table (or any other zone you use), hold your arm straight up and draw a circle in the air. Everything you need for the task should be within the circle for easy access.
- Make sure you take advantage of all the space in a room. Use the space under the crib to store clothes that your baby doesn’t quite fit into yet. The lower shelves and drawers of the changing table can be used to house additional diapers. Consider other “extra space” within your nursery and use it wisely.
- Since babies go through diapers and supplies rapidly, it makes sense to have an overstock of items. However, you only need a handful of diapers readily available at any given time. Place enough diapers to get you through a week in an accessible spot within the nursery, and then store the rest of your supplies somewhere out of the way.
- Since babies are constantly growing, add time to your calendar once every few months to rotate their items in the closet. Purge items that are too small and incorporate clothing from the next size up. Keep a bin in another storage area for items you want to donate, give to a family member or friend, or store for your next baby.
- When your infant starts to move around, ensure that everything in their line of sight is safe for them to touch. If you would rather they play with stuffed animals than tear apart diapers, store the toys at their level and keep the diapers up above the closet, for example.