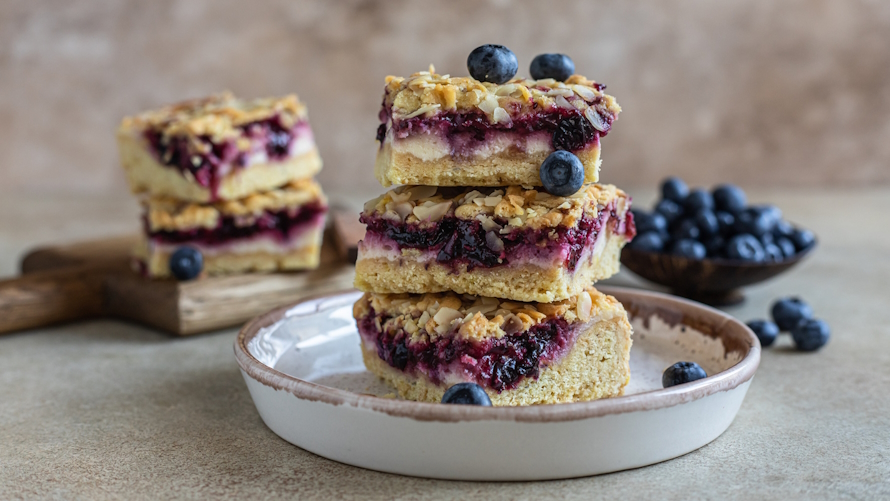

There is always a good reason to eat cake
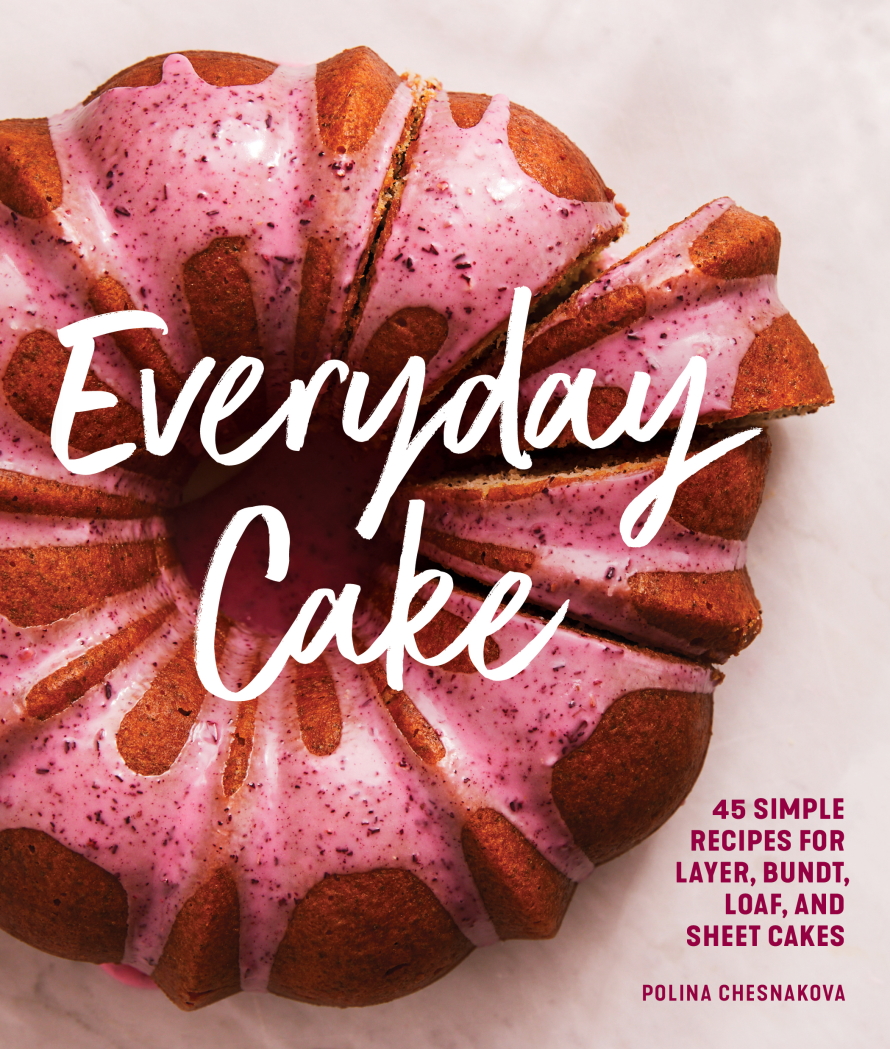
Birthdays, anniversaries, graduations, your average Tuesday — it seems like there is always a reason to eat cake. But if you’re like me, you find yourself reaching for that reliable (albeit boring) box of cake mix time and again. If you are ready to shake things up and wow your friends and family with incredible treats, you are going to want to pick up a copy of “Everyday Cake: 45 Simple Recipes for Layer, Bundt, Loaf, and Sheet Cakes.”
Polina Chesnaskova’s latest beautiful cookbook gives readers 45 mouthwatering cake recipes for each and every occasion (even made-up ones). From yellow birthday cake with whipped malt chocolate buttercream to grapefruit poppy seed cake with hibiscus glaze, to frosted apple-cinnamon oat cake, this book offers something to please every palate. The recipes are thorough and easy to follow, and the ingredients are clearly listed at the beginning of each recipe (with both measurements and weights, since Chesnaskova recommends using a kitchen scale for measuring ingredients).
The photography by Charity Burggraaf is stunning and will trigger instant salivation. I made the mistake of flipping through this book for the first time in public and caught myself saying “Yum!” out loud, more than once.
Novice bakers like myself will appreciate the other tips and advice this book offers. The introduction contains nearly 20 pages of baking tips and kitchen tool recommendations. Throughout the cookbook, Chesnaskova has sprinkled short asides featuring more baking secrets, such as how to crush cardamom, a primer on egg whites, and how to make homemade pumpkin or squash purée. Experienced bakers can easily skip these sections and jump to the recipes.
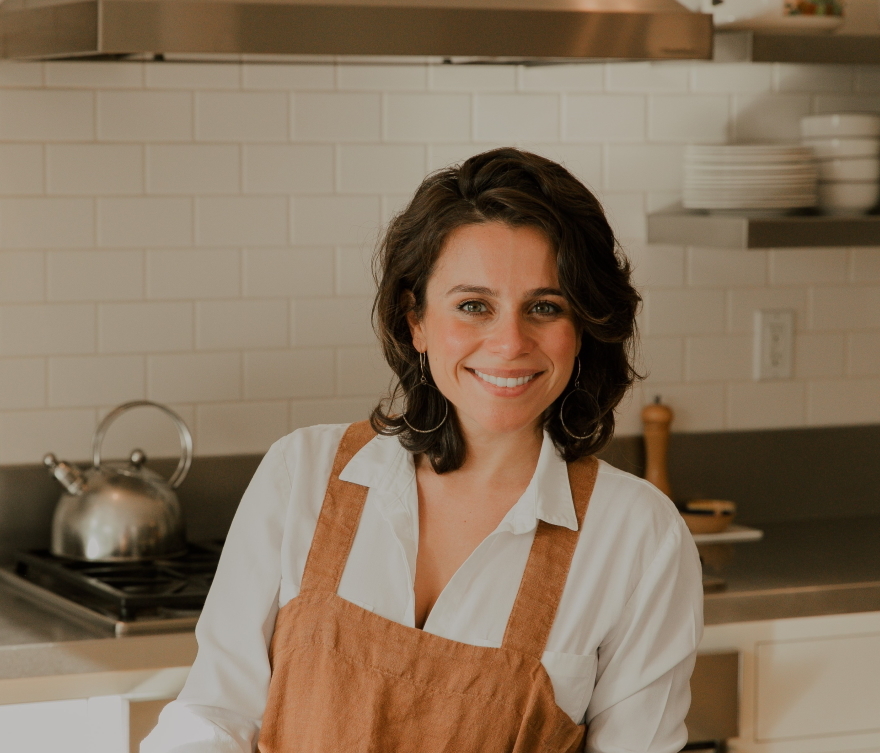
Chesnakova lives in Seattle and is the culinary director at Book Larder, Seattle’s adored (and only) cookbook-dedicated bookshop. Her writing has been published in Saveur, The Washington Post, The Kitchen and Seattle Magazine. She is also the author of “Hot Cheese: Over 50 Gooey, Oozy, Melty Recipes.”
Read our interview with Chesnakova, then click the link or the arrow at the top of the page to see the Yellow Birthday Cake with Whipped Malt Chocolate Buttercream recipe from her book.
Next up: Interview with Polina Chesnakova | Recipe: Yellow Birthday Cake With Whipped Malt Chocolate Buttercream
Interview with Polina Chesnakova
What inspired you to write “Everyday Cake”?
I knew I wanted to write a baking book, and everyone loves cake! You can make them as complicated as you want, or simpler, but they’re always welcome. When I looked at cake books that were already on the market, a lot of them focused on cake decorating or layering cakes, making four or five different components. I wanted to write a book about cakes that could be whipped up quickly, or at least straightforward and approachable enough in the ingredient list and instructions that they didn’t feel too fussy. Because no matter how much you dress up or dress down and cake, they always feel special.
I feel like the title “Everyday Cake” really encompasses that simplicity, and also the fact that you’ll find cakes in the book for every mood and occasion. There are even snacking cakes you can whip up in minutes! Whenever the need for something sweet pops up, I think readers will find something.
How is “Everyday Cake” different than other cake-focused baking books?
One thing that sets the book apart from other cake books or baking books is that it is organized by pan shape. I felt like that was more intuitive. You know, sometimes I get the craving for a chocolate cake, but a lot of times I’m like, Ooh, I want to use my Bundt pan. I want to make a Bundt cake! It’s great to open a book and see that there are 12 different Bundt cakes I can choose from. And I tried to offer a variety that would hopefully speak to a reader.
There are classics cakes that you know and are familiar with, but I’ve added a twist to each one to add a little bit of nuance and inspiration.
What is your “go-to” recipe from this book?
For its simplicity and adaptability, it’s the olive oil cake. I have the ingredients on hand (flour, sugar, oil, eggs, etc.) and the fact that it is oil-based means I don’t have to wait for the butter to come to room temperature. It’s also easy to whisk together, so I don’t have to pull out a stand mixer. It’s really hard to mess up and it always comes out great. I recommend serving it with some sort of fruit compote or preserve on the side, so it’s also a great way to showcase whatever is in season at the time. I’ve made it with a rhubarb compote, strawberries. You can make the compote at home, or you can also use store-bought jam or preserves.
It’s a great everyday cake to have just lying around, but it also makes a very simple and elegant dessert.
Editor’s note: I made the olive oil cake and it was amazing! A wonderful crispy outside, soft inside, delicious. It was a hit with my family, too, always a win. I think this will become a regular treat in our house.
If someone is new to baking, which recipe should they try first?
The first one that comes to mind is the olive oil cake. I have a handful of recipes in the book where you can just dump everything in one bowl and whisk it together and bake — nice and simple.
I’d also recommend the double chocolate zucchini Bundt cake. You just combine the essential cake ingredients together with zucchini and then make a chocolate ganache, which is pretty straightforward, and pour it over the cake.
There’s also the apricot cornmeal skillet cake. You melt butter, so again you don’t have to wait for the butter to come to room temperature, and you don’t have to deal with creaming.
And finally, the lemon lavender yogurt cake is also another one where you whisk everything together in one bowl. And again, no need to make frosting!
The book has a section about useful baking tools. What are three kitchen tools you can’t live without?
One tool I use every day when it comes to baking is a rubber spatula, particularly my mini rubber spatula. It’s great for scooping out ingredients and getting all the last bits of batter out of a bowl, or oil out of a container. It’s also great for stirring, so my rubber spatula is a go-to for sure.
Another is my kitchen scale. I really think if you’re going to invest in anything for the kitchen, for consistency’s sake and for success, it’s the scale. You can get a really good one for $20 and it can up your baking game! The way I measure a cup of flour might be different from the way that you measure a cup of flour. Multiply that by every ingredient in the recipe, and you might end up with a totally different result than I do. A kitchen scale also makes for easier cleanup, because you’re not using a bunch of measuring cups.
I’d say a third tool is my hands. Hands are the best kitchen tool! You can do everything with your hands.
Were there any challenges you encountered during the writing process? Any advice for aspiring cookbook authors?
I think for many writers a big challenge is making your deadlines. So, being really organized, making a plan for yourself and learning how to multitask are really important. At first, I was making one cake at a time and I was like, I’m never going make my deadline this way! So, I really learned to multitask and test different cakes at the same time.
Also, don’t be afraid to ask for help, even if it’s just asking someone else to taste-test. When I was making a recipe, having a fresh set of eyes, someone who hasn’t had the cake yet, provided really, really helpful input. A lot of my recipe testers were friends and family who just wanted to help out and who wanted to bake. They were able to look at my recipe with a fresh set of eyes and pick up on things that I missed.
Do you have any advice for helping kids fall in love with baking?
When I was a kid and I was really getting into baking, I remember wishing that my parents would have just sat down with a cookbook and said to me, “Okay, what speaks to you? What do you see that gets you really excited to bake?”
I think just going in the kitchen and being patient with children and reminding yourself that the end result is not necessarily the point is key. It’s the act of baking that really matters, and sharing in that sense of wonder.
Baking is sort of like alchemy, so sharing in that excitement and that tactile experience and not being afraid of the mess, which is inevitable. If half the flour mixture ends up on the counter and batter gets everywhere, that’s just part of the fun!
Next up: Recipe: Yellow Birthday Cake with Whipped Malt Chocolate Buttercream
Recipe: Yellow Birthday Cake With Whipped Malt Chocolate Buttercream
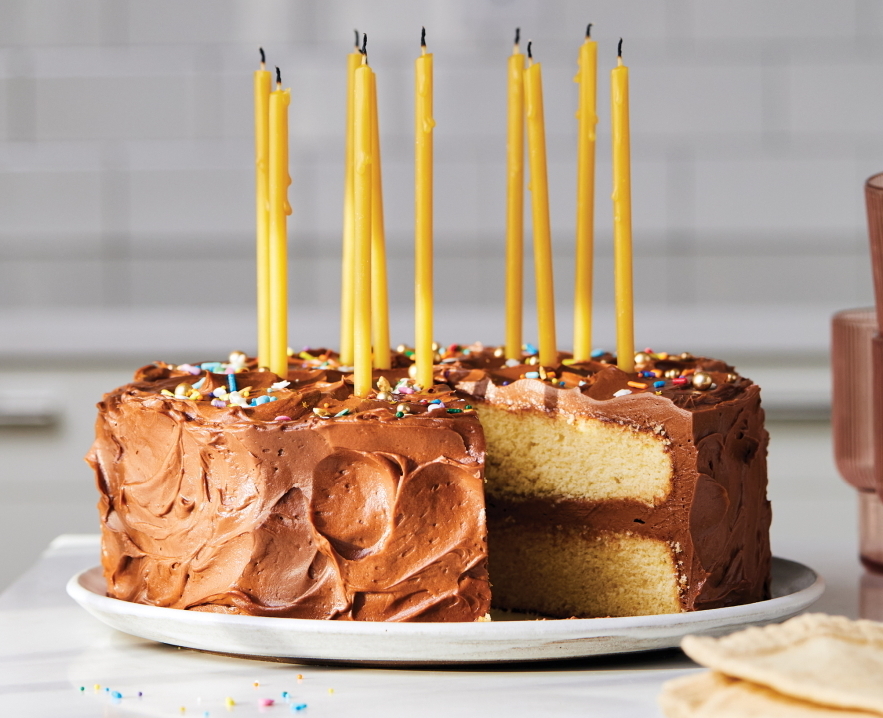
When I was kid, I was always asked “Chocolate or vanilla?” when it came to dessert. I believe that the two are best not kept apart but matched together. This classic yellow cake is filled and decorated with a whipped chocolate ganache frosting. It’s rich yet light, silky, and good enough to be eaten by the spoonful. But to really make the components sing, I’ve turned to another ingredient of my childhood: malted milk powder. The powdered grain extract brings a toasted, butterscotch-y depth of flavor that amplifies both the vanilla in the cake and the chocolate in the frosting. Find it either in the baking aisle next to the sweetened condensed milk or with the powdered hot cocoa.
— Polina Chesnaskova, “Everyday Cake”
MAKES 8 TO 10 SERVINGS
- 3 cups (390 g) all-purpose flour
- 1/4 cup (30 g) malted milk powder
- 1 tablespoon baking powder
- 1 teaspoon kosher salt
- 3 eggs, at room temperature
- 3 egg yolks, at room temperature
- 2 tablespoons neutral oil, such as canola or safflower
- 2 1/2 teaspoons vanilla extract
- 2 cups (400 g) granulated sugar
- 1 cup (225 g) unsalted butter, at room temperature
- 1 cup (235 ml) whole milk, at room temperature
For the frosting
- 1/2 cup (65 g) malted milk powder
- 1/4 cup (50 g) packed light brown sugar
- 6 1/2 ounces (185 g) bittersweet chocolate, finely chopped
- 1 cup (235 ml) heavy cream
- 1 cup (225 g) unsalted butter, at room temperature
- 1 3/4 cups (210 g) powdered sugar
- 1 1/2 teaspoons vanilla extract
- 1/2 teaspoon kosher salt
Preheat the oven to 350 degrees F. Grease two 9-inch cake pans and line the bottoms with parchment paper.
In a medium bowl, whisk together the flour, malted milk powder, baking powder, and salt. In a small bowl, whisk together the eggs, egg yolks, oil, and vanilla to combine.
In the bowl of a stand mixer fitted with the paddle attachment, beat the sugar and butter on medium speed until light and fluffy, 4 to 5 minutes, scraping down the bottom and sides of the bowl often. Reduce the speed to medium-low and gradually add the egg mixture a bit at a time, letting it fully incorporate before adding more and scraping down the bowl and beater as needed.
Reduce the speed to low and add the flour mixture in three additions, alternating with two additions of the milk, mixing until just combined and scraping down the bowl as needed. Use a silicone spatula to fold the batter a few more times to make sure it’s smooth.
Divide the batter evenly between the prepared pans and smooth out the tops. Bake, rotating and switching their positions halfway through, until the cakes spring back when pressed and a tester inserted into the centers comes out clean, 25 to 30 minutes. Transfer the pans to a wire rack and allow the cakes to cool completely. (The frosting is best used as soon as it’s made, so the cakes should be fully cooled and leveled if needed before proceeding.)
To make the frosting, in a small bowl, whisk together the malted milk powder and brown sugar so there aren’t any lumps; top with the chocolate. In a small saucepan, heat the heavy cream over medium heat until the edges begin to simmer. Pour the hot cream over the chocolate and let it sit, undisturbed, for 1 minute. Whisk until the mixture comes together and is smooth and shiny. Allow it to cool to room temperature — if you’re strapped for time, chill it in the freezer, stirring every few minutes, until it is cool to the touch, 10 to 15 minutes.
Meanwhile, in the bowl of a stand mixer fitted with the paddle attachment, beat the butter on medium-high speed until light and fluffy, 2 to 3 minutes. Sift in the powdered sugar, then add the vanilla and salt. Mix on low speed to combine, then increase the speed to medium-high and beat until light and fluffy, 2 to 3 minutes. Add the cooled ganache and mix on low speed to fully incorporate, pausing to scrape down the bowl. Increase the speed to medium and beat until light, fluffy, and silky, 45 to 60 seconds. Season with more salt to taste. For the best consistency, use immediately. Otherwise refrigerate in an airtight container for up to 2 weeks — allow it to come to room temperature and re-whip before using.
To assemble the cake, place one of the layers (top side up) on a cake stand or plate. Tuck strips of parchment paper under the edge of the cake to keep the plate clean. Top the layer with about 1 cup of the frosting and use an offset spatula to spread it into an even layer. Center the second cake layer (top side down) over the frosted layer and nestle it on top. Using as little frosting as possible, spread a very thin crumb coat over the top and sides of the cake and fill any gaps. If possible, refrigerate the cake for 20 minutes to set it.
Spread the remaining frosting evenly all over the top and sides of the cake, making swoops and swirls with the spatula or a spoon. Serve the cake the same day or refrigerate for 2 to 3 days — allow it to come to room temperature before serving.
© 2022 by Polina Chesnaskova. Excerpted from “Everyday Cake” by permission of Sasquatch Books.