
Cooking with cast iron is for everyone
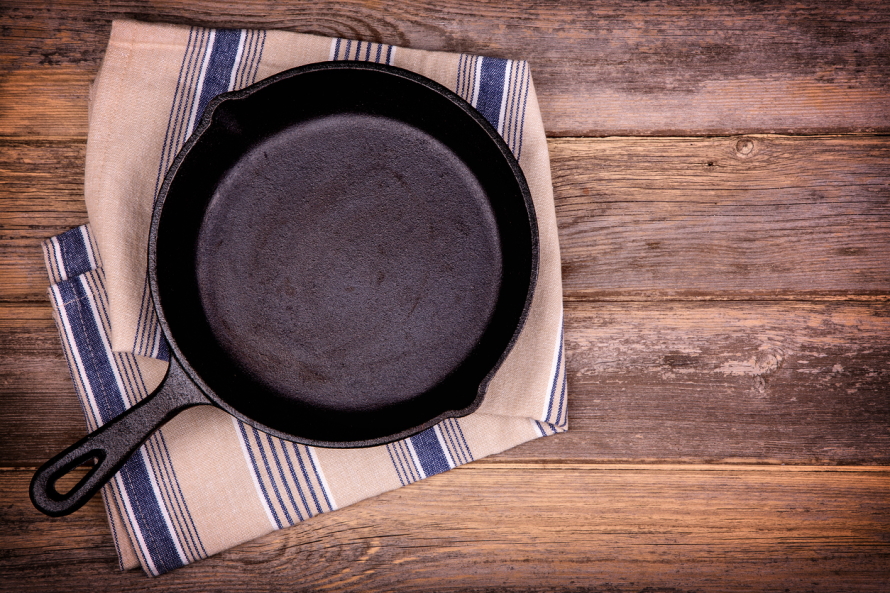
I have always found cast iron skillets a bit intimidating. The mysterious seasoning process, rules around cleaning and their sheer weight made them feel like a kitchen implement beyond my culinary ken.
But then, I opened Jackie Freeman’s latest cookbook, “Cast Iron Skillet One-Pan Meals.” The thought of making a meal for my family in just one pan had me hooked, and the fact that this books contains a whopping 75 recipes only increased my interest.
The introduction was incredibly helpful to a novice like me, and the very first line was a “Lord of the Rings” pun. I’m totally in.
Freeman’s writing style is clear, informative and funny. It feels like a friend giving you tips and tricks in her area of expertise. There is nothing stuffy or formal about it, and those things I thought were so intimidating — seasoning, proper cleaning, etc. — don’t feel so daunting anymore.
More experienced cast iron skillet cooks can easily skip the intro and dive straight into the recipes, which are divided into five sections: veggie and egg, seafood, poultry, beef and pork. Many of the recipes are accompanied by gorgeous photos (by Charity Burggraaf) which made me want to try them all!
I was lucky enough to have the opportunity to ask Freeman a few questions about her new book and her love for cast iron cooking. Use the arrows above or click the links below on to see her answers and three sample recipes from her book (Easy Chicken Enchilada Skillet, Stir-Fried Teriyaki Beef With Broccoli and Three-Bean Tamale Pie. Yum!)
Up first: Q & A with Jackie Freeman
Q & A with cookbook author Jackie Freeman

What recipe would you recommend as a first to try for a cast iron skillet novice?
I wrote this book with the intention that almost every recipe is easy — and delicious — for every skill level. Whether you’re a cast-iron novice or pro, I wanted accessible recipes for every cook.
That being said, if you’re just dipping your culinary toes in the cast-iron waters, I recommend low-prep meals like Pan-Seared Gnocchi With Spinach and White Beans; Baked Cod With Artichokes, Sun-Dried Tomatoes and Olives; Easy Chicken Enchilada Skillet; and Reuben Dutch Baby.
Do you have a go-to recipe in this book?
Ooh, that’s like picking a favorite child! They are all special and delicious in their own way. But, I will say, my go-to comfort food on a weeknight is the Pasta e Ceci — Italian Pasta and Chickpea Stew — or the Meatballs With Caramelized Onions and Pine Nut Lemon Rice.
What is your family’s favorite recipe?
The kids are big fans of the Pork Ramen With Bamboo and Mushrooms, though, they *do* pick around both the bamboo and mushrooms, and the Cheeseburger Macaroni.
What is a common mistake people make when learning to cook with a cast iron skillet?
The biggest mistake is that folks think cooking with cast iron is scary or you need specialized knowledge or skills to use your skillet! It is actually a very forgiving cookware to work with, especially when it is well-seasoned.
The second biggest mistake is not taking the time to dry out your clean skillet over low heat and give it a little dab of oil before storing.
What is your No. 1 tip for cooking with cast iron?
Have fun and don’t be intimidated! This is one of those kitchen items that will literally last a lifetime — and then some! — so use your cast iron often for all kinds of dishes. So, build a good relationship with your skillet and it will treat you well for a lifetime of meals to come.
And, at the risk of repeating myself: Don’t forget to properly dry and season your skillet each and every time after use, before storing it until you are ready to cook with it again.
Now to the recipes: Easy Chicken Enchilada Skillet
Easy Chicken Enchilada Skillet
© 2022 by Jackie Freeman. All rights reserved. Excerpted from “Cast Iron Skillet One-Pan Meals” by permission of Sasquatch Books.
This one is a bit of a hot mess, but in a really good creamy, warm and filling kind of way. Leftover chicken is given new life with spices, pinto beans and fresh cilantro and then simmered in salsa and sour cream. Corn tortillas are mixed into the lot (no messy rolling of enchiladas here, so not entirely a hot mess after all!), then it’s all topped with cheese. It also happens to be kid-approved, especially if you opt for milder and sweeter salsa. Or you can up your game for the sports-watching gang and go for the spicy stuff.
MAKES 4 TO 6 SERVINGS
- 2 tablespoons high-heat oil, such as canola or safflower
- 1 small yellow onion, chopped
- 3 medium cloves garlic, minced
- 1 teaspoon ground cumin
- 1 teaspoon ground coriander
- 1 teaspoon dried oregano
- 2 cups shredded cooked chicken
- 1 (15-ounce) can pinto beans, drained and rinsed
- Kosher salt and freshly ground black pepper
- 1 (16-ounce) jar mild to spicy red salsa
- 1 cup chicken broth or water
- 1⁄2 cup sour cream
- 3 tablespoons chopped fresh cilantro
- 6 (6-inch) corn tortillas, cut into eighths 1 cup (about 4 ounces) shredded Mexican blend cheese
- Lime wedges, for serving
1. Heat the oil in a 10-inch skillet over medium heat. Add the onions and cook until softened, about 5 minutes. Stir in the garlic, cumin, coriander and oregano and cook until fragrant, about 1 minute. Add the chicken and beans. Season to taste with salt and pepper.
2. Pour in the salsa and broth and bring to a simmer. Cook at a gentle simmer, stirring occasionally, to warm the chicken through and meld the flavors, about 10 minutes. Fold in the sour cream and cilantro. Carefully stir in the tortillas, a handful at a time, until they are coated with the sauce and submerged in the skillet. Sprinkle the cheese over the top.
3. Preheat the broiler to high heat with the rack 6 inches from the element.
4. Transfer the skillet to the oven and broil until the cheese is melted and bubbling, 3 to 4 minutes. Serve with the lime wedges for squeezing.
TIP: If you leave the tortillas out of the dish and serve it with tortilla chips, it makes an awesome dip for a crowd.
Up next: Stir-Fried Teriyaki Beef With Broccoli
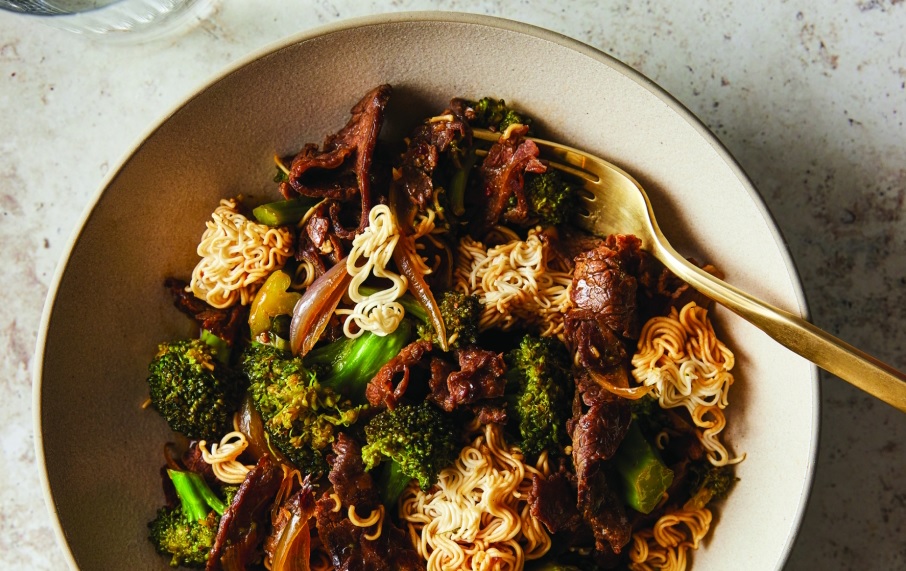
Stir-Fried Teriyaki Beef with Broccoli
© 2022 by Jackie Freeman. All rights reserved. Excerpted from “Cast Iron Skillet One-Pan Meals” by permission of Sasquatch Books.
I would like to tell you that the ingenious crunchy ramen topping in this recipe was born because I am a one-skillet, one-meal master. Truth be told, teriyaki beef with broccoli is a staple at our house. It’s easy to make and the kids love the salty-sweet sauce, so much so that they will even attempt a few bites of broccoli. However, I normally serve it with yakisoba noodles. Well, one hangry evening I realized that I forgot to buy yakisoba and it was too late to make a pot of rice, so … I crumbled some of their much-loved ramen noodles on top, totally uncooked, and handed them their plates. Instant winner and moment of genius. It’s easiest to cut the flank steak super thin when the steak has been placed in the freezer for about 30 minutes.
MAKES 4 SERVINGS
- 1 pound flank steak
- 6 tablespoons soy sauce, divided
- 2 tablespoons plus 1 teaspoon white sugar, divided
- 1⁄2 cup chicken broth
- 2 tablespoons mirin or white wine
- 2 teaspoons cornstarch
- Pinch of red pepper flakes (optional) 2 tablespoons plus 1 teaspoon sesame oil, divided
- 2 medium shallots, thickly sliced
- 1 medium head broccoli (about 1 pound), cut into small florets
- 1⁄2 cup water
- 3 medium cloves garlic, minced
- 1 tablespoon minced peeled fresh ginger 2 (3-ounce) packets ramen noodles, flavor packets discarded
1. Trim the flank steak of excess fat. Cut it into 2-inch-wide strips with the grain, then into 1⁄8-inch-thick slices against the grain. In a medium bowl, toss the beef with 3 tablespoons of the soy sauce and 1 teaspoon of the sugar. Let rest for 10 minutes.
2. In a separate bowl, whisk together the remaining 3 tablespoons soy sauce, remaining 2 tablespoons sugar, broth, mirin, cornstarch and red pepper flakes. Set aside.
3. Heat 1 tablespoon of the oil in a 10-inch skillet over medium-high heat. Add half the beef in a single layer and cook, without stirring, for 1 minute. Stir the beef and cook until browned, an additional 1 to 2 minutes. Transfer the beef and any pan juices to a plate. Repeat with the remaining beef.
4. Add 1 tablespoon of the oil to your skillet over medium heat. Add the shallots and cook until just starting to soften, about 3 minutes. Add the broccoli and cook, stirring often, for an additional 2 minutes. Add the water and cook, covered, until the broccoli is just tender, 3 to 4 minutes.
5. Uncover the skillet and push the vegetables to one side. Add the remaining 1 teaspoon oil, garlic and ginger to the center of your skillet. Cook until fragrant, about 30 seconds. Stir the garlic-ginger mixture into the broccoli. Stir in the beef, along with any juices.
6. Whisk the sauce mixture to recombine and pour over the beef and broccoli. Cook, tossing constantly, until the sauce has thickened, 1 to 2 minutes. Crumble the ramen over the beef and broccoli mixture, stir gently to combine, and serve immediately.
TIP: If you like a slightly softer ramen (more noodle-like), stir it into the beef mixture, cover the skillet, and let it sit for 5 minutes before serving.
Up next: Three-Bean Tamale Pie
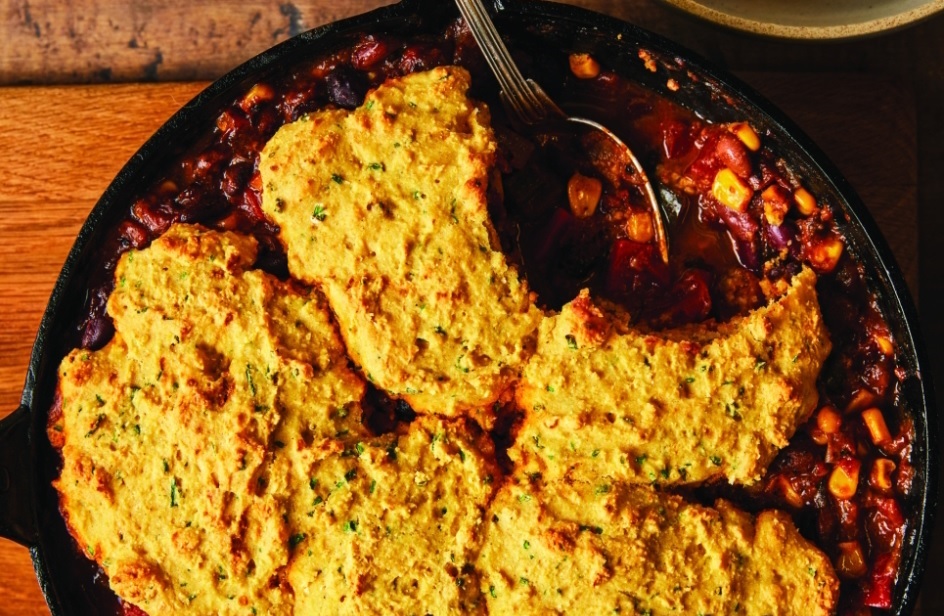
Three-Bean Tamale Pie
© 2022 by Jackie Freeman. All rights reserved. Excerpted from “Cast Iron Skillet One-Pan Meals” by permission of Sasquatch Books.
We call this meal “the beast.” It’s larger than life and a little bumpy on top. It likes to bubble over when baking, so make sure to put your skillet on a sheet pan before putting it in the oven. And it may be “just” a vegetarian meal, but it is hearty and filling AF. If you can’t find a can of three-bean blend, pick and choose two of your favorite beans (red kidney, pinto, or black bean) for a two-bean tamale pie. Heck, in a pinch, you can even make it a one-bean tamale pie, and it will be just as yummy and satisfying. Using fire-roasted tomatoes gives this dish a bit of a smoky edge. Poblano peppers are only mildly spicy, but if you’re worried about heat, you can swap out the poblano with an additional bell pepper.
MAKES 6 SERVINGS
For the filling
- 2 tablespoons high-heat oil, such as canola or safflower
- 1 small yellow onion, diced
- 1 medium red bell pepper, diced
- 1 medium poblano pepper, diced
- 3 medium cloves garlic, minced
- 2 teaspoons chili powder
- 1 teaspoon dried oregano
- Kosher salt and freshly ground black pepper
- 2 (15-ounce) cans three-bean blend (red kidney, pinto, and black bean), rinsed and drained
- 1 (15-ounce) can fire-roasted diced tomatoes
- 1 cup frozen corn, thawed
- 1 cup vegetable broth or water
- 1 cup (4 ounces) shredded pepper jack cheese
For the topping
- 3⁄4 cup all-purpose flour
- 3⁄4 cup cornmeal
- 2 tablespoons chopped chives
- 3⁄4 teaspoon baking powder
- 3⁄4 teaspoon kosher salt
- 1⁄4 teaspoon baking soda
- 3⁄4 cup buttermilk
- 3 tablespoons high-heat oil, such as canola or safflower
- 1 large egg
Sour cream, for serving
1. Preheat the oven to 400 degrees F.
2. To make the filling, heat the oil in a 10-inch skillet over medium heat. Add the onions and peppers and cook until soft, about 5 minutes. Stir in the garlic, chili powder, and oregano and cook until fragrant, about 1 minute. Season to taste with salt and pepper.
3. Stir in the beans, tomatoes, corn and broth and bring to a simmer. Reduce the heat to medium-low and cook until the mixture has thickened slightly, stirring often, 5 to 10 minutes. Remove from the heat and stir in the cheese until well combined. Season to taste with salt and pepper.
4. To make the topping, in a medium bowl, whisk together the flour, cornmeal, chives, baking powder, salt and baking soda. In a separate bowl, whisk together the buttermilk, oil and egg. Stir the buttermilk mixture into the flour mixture until just combined.
5. Using a large spoon, place dollops of the cornbread batter on top of the bean filling, as evenly dispersed as possible. Place the skillet on a sheet pan and transfer the skillet to the oven. Bake until a pale golden brown and a skewer inserted into the cornbread comes out clean, 20 to 25 minutes. Let cool for 15 minutes before serving with sour cream.
TIP: You can actually make your own buttermilk in a pinch. Combine 3⁄4 cup of whole milk with a scant tablespoon of white vinegar or lemon juice. Give it a stir and let it sit for 10 minutes before using.