
This article was sponsored by Ascend Hospitality Group.
Editor’s note: This article is not for the faint of … meat!
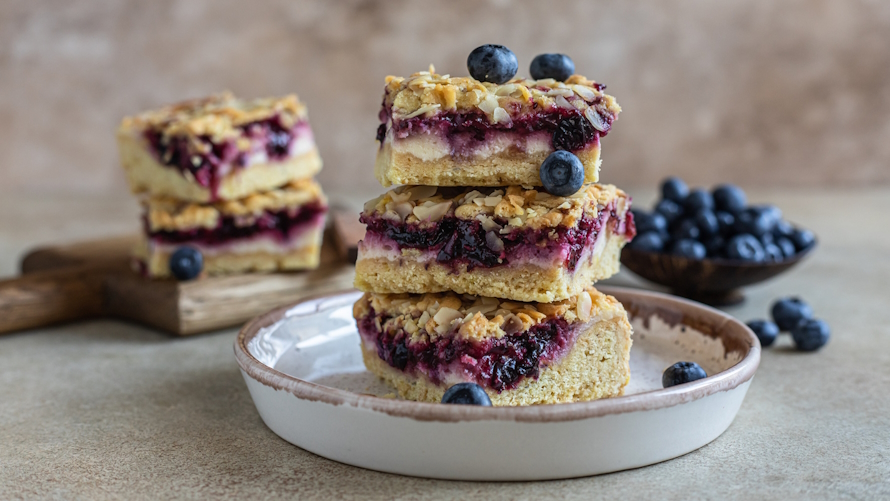
The season of “Dads and Grads” is upon us — that time of year for family get-togethers focused on festive feasts to celebrate our fave fathers and stupendous students. At the top of the menu for many celebrants? Steak!
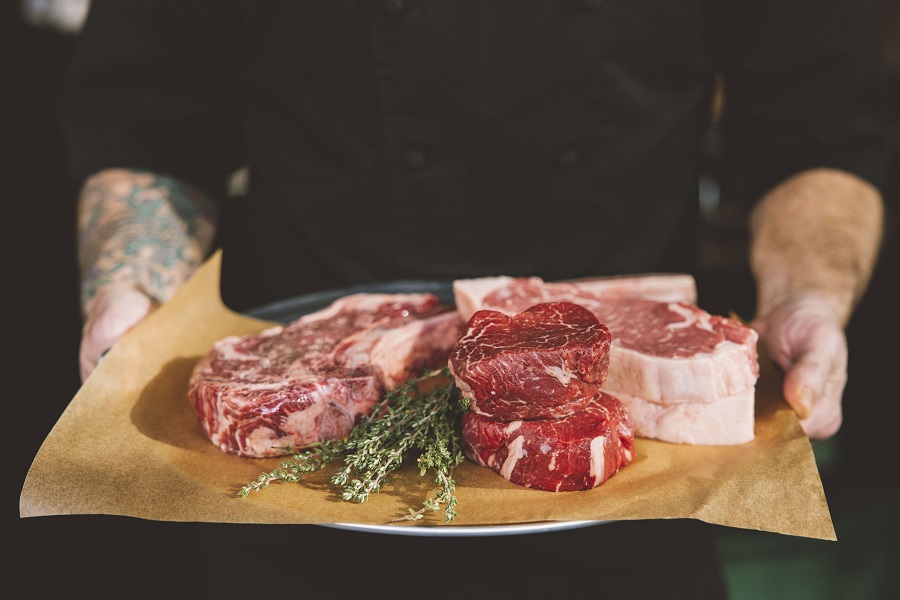
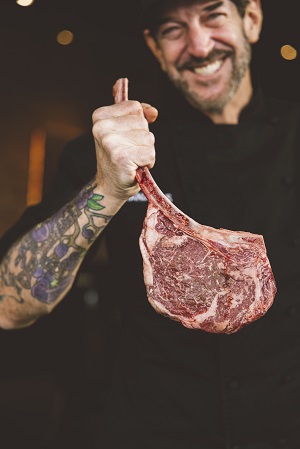
This ParentMap editor was tickled pink (medium-rare?) to get the chance to interview Ascend Hospitality Group (AHG) corporate executive chef Scott Letourneau about how to cook a perfect steak. (I have a fave father and two graduates to fête this June, after all!) Letourneau manages the culinary team at AHG’s Stanford’s restaurants, which are known for their classic American steakhouse dining experience, imaginative accompaniments and signature cocktails.
While Stanford’s meat larders contain only “upper 2/3” premium cuts, Letourneau has plenty of great tips for how to take our home-cook steak preparation to a whole new level.
Q: They say you should never pick a favorite child … but do you have a favorite cut of meat? A:
Yes, I do! If we’re talking about what everybody has accessibility to — let’s say, something available If you shop at Costco … Costco’s got great meat — their ability to buy allows them to get a quality product that is very consistent across the board. I do tend to like a little bit more fat content. I’ll trim it and get it how I like it, which is why I gravitate toward a ribeye if I’m going to go into a higher-end steak. I also love New York steak — I like the bite and flavor profile of it. The consistency of that cut is fantastic. But, I’d say a ribeye is probably my overall choice.
Q: What is a more affordable cut that you champion? A:
I like a tough sirloin, done correctly. I’ve got teeth for a reason! I don’t mind chewing. I don’t have to have a filet mignon every time. It’s the little details and subtle secrets of preparation that matter, especially when you are preparing a thicker cut. It is just about allowing the amount of time that’s needed to render the fat appropriately. Your fat isn’t something that you cut off because you think it is not palatable. When you allow it to have the amount of time that it needs to cook at the appropriate temperature, then that fat turns into something different. It’s crispy … it is unctuous and juicy, and you’re cutting up pieces of that fat and adding them to your meat.
It’s all in the cutting and preparation of that steak. I may cook a flank steak for my mom, for example, but if you’re cutting into it with the grain, that steak is going to eat much differently than it would if you were to cut it against the grain, right? Those little subtleties. When you cut into it the right way, you’re already getting the best texture, the best flavor profile and mouth feel that you would want from that steak.
Q: Say a home cook wants to take their steak cookery up a notch. What tips do you have for preparing stellar steak outside of a professional kitchen? A:
I do this for a living, but 85–90 percent of the time I’m cooking at home. Absolutely, there are preferred methods for me. I love cooking outside on a clean grill in the summertime or when it’s nice out, but living in the Pacific Northwest, it’s not always favorable to go out and barbecue. Sure, barbecue has its advantages, but that doesn’t necessarily mean that you can’t cook an amazing steak inside the house!
You need proper tools: first and foremost, a cast iron skillet. My cast iron skillet sits on top of my range at all times. It’s going to give you a nice even heat distribution across the entire bottom, and that’s really what you want. Now, one thing you’ve got to think about when you’re cooking steak in a cast iron skillet: Things will get smoky in the house, so be prepared for that!
If you’re a fan of medium-rare to medium steak, I would say just take the time to get all of that proper coloring on top of the stove, but if you’re into a more well-done steak, finishing in the oven is a great option for you. Start on the top of the oven to create a nice sear, which protects the outside of the steak and prevents the steak from pushing out juice and allows your seasoning to adhere to the meat very well. I then place it into a 400-degree oven until the steak comes up to the temperature I want, pull it out and let it rest for at least 15 minutes. [While it rests, the meat will] gradually come up usually about 8–10 degrees.
Another tip: Absolutely make sure to sear all sides of the steak, even the fat cap side if it’s a New York strip. Some nice caramelization on there really is going to enhance the flavor profile of the steak.
Q: Let’s talk seasoning secrets. What’s your church? A:
Some great salt and fresh-cracked pepper enhance just about everything you put them on, right? So, that’s usually my profile: just salt and pepper. If you want to season liberally at the beginning, you can add different things. Granulated onion, granulated garlic, chili flakes, salt and pepper — that’s my mix for the rub I put on steaks at the Stanford’s restaurants.
I use a higher-grade salt with my steak. It depends upon your application, but I like to use a good grey salt. I think it melts into the meat much better. I will use something that’s a little bit coarser, no less than the consistency of the kosher salt you would buy at the store.
And, there are other salts that are really out there for one purpose, and that purpose is to finish something so that you can actually see the salt. Maybe you want the crunch of the salt, so it’s for texture. But if you’re looking for flavor, then you want a salt that will melt into the steak. For that, I like a sea salt. When I’m doing meat, fleur de sel melts in very nicely. If you want to get fancier, grey salt usually has a little bit of moisture content in it. It’s a little bit finer and kind of smears and rubs onto the steak and adheres to it.
If you’re looking for a nice crust, then absolutely freshly ground pepper is a must. I like the warmth of it: If you’re going to go for freshly ground pepper, you can leave out the chili flakes, as the pepper is going to provide enough heat for you. But, baseline: salt and pepper. Make sure that the entire surface of the steak is seasoned well, because you’re going to want to cook all sides of your meat.
Q: What would you say are some of the common mistakes people make when cooking steak? A:
There are multiple things. As I mentioned, make sure you take the time to cook the steak on all sides. In that same vein, No. 1: Make sure you have the time to do what you want to do. If you have purchased a great cut of meat, handle it properly, safely — and make sure that you have the time to prepare it! Remember that proper resting gives you time to finish up: to toss the salad, add the nuts or croutons at the end, or whatever you need to do. And when I say taking the time and making sure that you’re properly resting the meat, I also mean resting it before cooking.
Most common mistakes are with seasoning. [People] toss it on there and don’t get it even. Maybe it sticks, maybe it doesn’t. No! You want to make sure that the bite you have on the outside edge, which has all the fat and the caramelized beef, is as seasoned as the middle. So, make sure that you’re getting even distribution on your seasoning, first and foremost.
So, the rest. When it comes to common mistakes, the cardinal sin is pulling a steak out of the fridge, seasoning it and throwing it directly onto the broiler. Even if you rest it at the end, you’ve missed one important part of the cooking: Take those steaks out of refrigeration and set them on the counter to start to come up to room temperature. That’s going to allow that steak to cook evenly all of the way through. If you only allow it to sit out for a small amount of time, maybe a quarter-inch of that steak starts to actually reach room temperature. But that middle is still very, very cold, and that’s not going to allow you to have that same consistency that you’re looking for all the way through, which completes during that second phase of the rest.
If you don’t get that first stage of the rest, the second part will not be optimal. Take the time, pull your steak out, get your other stuff prepped, let that salt melt into the steak.
Another thing: To ensure that you’re going to get a good consistent crust, make sure to preheat! Whether it is your cast iron skillet or that nice hot spot on your grill that is clean and free of debris. That’s how you can achieve a nice adherence to that cook surface for the steak to get some nice caramelization, which adds the flavor.
Little tips on barbecue. If you’re cooking a larger or thicker cut of meat that has a heavier fat content, such as a New York strip or a ribeye, your steak needs time to render that fat. When you allow the fat to cook down [instead of cutting it off], it’s actually part of the experience.
Keep your barbecue covered at the beginning to allow your grill to get properly hot. Then, pop that grill open, put your steak on and allow it to cook uncovered. It’s a barbecue, so the heat is not coming from the top — it’s not a broiler-type of situation. When you cover it, you create radiant heat, so all of a sudden you’ve created an oven. But we’re after a sear and we’re looking for rendering time, so we don’t want to rush it. If I put that lid down, that steak’s going to cook much faster from the outside. It won’t allow it to cook properly and evenly through or allow that fat to render off. So, keep that top off!
When you flip a steak, move it to a different portion of the grill, don’t return it to the portion where it has already been. The temperature there has come down pretty dramatically. At Stanford’s, we do a four-turn method. I will cook a steak on one side. Then, when it’s ready to be flipped — and it is ready when it starts to naturally release from the grill — I will flip that steak all the way over and put it on another hot portion of the grill, which creates a nice caramelization on the meat. Once it’s finished there, I will flip it over again, finding another grill portion, and then finish it up with a fourth turn. I want to make sure that I’ve got a good crust, and that takes that last turn.
But the idea behind it is really to allow your meat to cook properly. You don’t need to mess with it. The only kind of messing with it you want to do is maybe taking your tongs and just feeling if the steak is ready to release or not. When those corners start to lift up and the steak lifts up very easily — boom! — let’s go to another hot spot on the grill.
Q: Any final tip you’d like to share? A:
Don’t be afraid to pick up a cut of meat that you’re not used to. Different meats are going to have different flavors, they just are. Stepping out of your comfort zone sometimes and trying something different can change your whole palate and open you up to a whole different world.
Sponsored by: