

 Saving the seeds from your own homegrown vegetables may sound daunting, but it’s easier than it seems. With a few simple strategies, you can begin this horticultural tradition in your family and reap a bountiful harvest of heirloom vegetables for years. Here are tips for saving seeds effortlessly from four vegetables and herbs.
Why seed save?
Seed saving is a rewarding and educational activity to do with your child. As a teacher, I know that kids receive education on plants and their life cycles throughout their elementary science education, but what better way to build on that knowledge than by putting it into practice in the garden. It is an earth-science lesson in disguise!
To understand seed saving is to understand the life cycle of the plant. A seed is a living organism in a dormant state. At first, the baby plant receives nutrients from within before it develops a root system that will take in “food” from the soil. Then, it develops its stem and leaves. A plant produces flowers next, which will then develop into fruit. Depending on the plant, the “fruit” could be something we commonly eat, like a tomato, or it could be a seed pod.
The final stage of a plant’s life is the development of its seeds inside the fruit. The seeds are either collected and planted or, left to its own devices, naturally fall to the ground, beginning the life cycle once again.
If you’re planning on saving seeds, you’ll want to choose seeds of the heirloom variety. Hybrids, plants bred from different varieties, won’t produce the same plant the following year. Also, once the plant gets growing, pay attention to the ones that are the most robust and plentiful. Keep an eye out for the earliest ripe tomato, for example, and save the seeds from that fruit. The healthy, flavorful plants are the ones you’ll want growing in your garden year after year.
Four best varieties for beginning seed savers
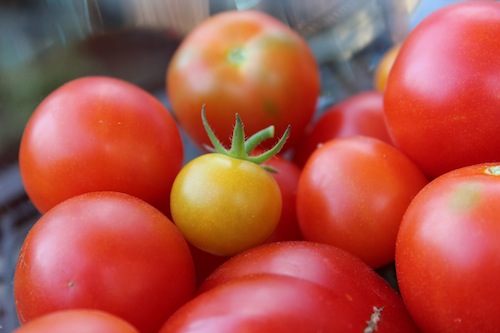 Tomatoes
Tomatoes are delicious and their seeds are easy to save! First, let the tomato ripen on the vine. When ripe, cut it in half and squeeze the seeds into a jar. Fill the jar about half way with water, gently swirl and leave on the counter for several days, until a white scum forms over the top of the water.
This is a fermentation process that removes the gelatinous coating from around the seeds. Skim off the scum and the immature seeds that have floated to the top and pour through a strainer. Rinse the seeds well and then spread them out onto paper to dry. Place the dry seeds into an envelop, label and store.
Favorite heirloom tomato for Northwest gardens: Stupice
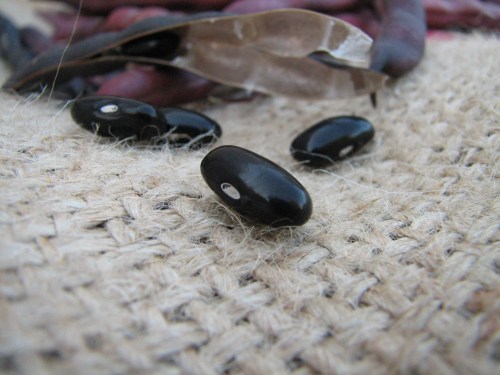 Beans
Beans
Bean seeds are fantastic since you can enjoy them in their immature state as green beans and then as cooked dried beans in a soup or in a taco. Bush bean varieties won’t need trellising support. For climbing pole bean varieties, you can use an extra tall trellis – harvesting and eating the ones that are low as fresh green beans and letting the hard-to-reach pods dry for saving.
Let the pods dry on the vine or lay them out flat in a warm, dry space and then remove the seeds from the dried pods. Store in a clean, dry mason jar with a lid. It’s that easy!
Favorite heirloom bean for Northwest gardens: Cherokee Trail of Tears black beans
Kale
The part of the plant we typically eat on the kale plant is the leaves. But did you know that when it starts to go through the next flower-producing stage you can eat those buds like broccoli? It’s delicious! If you’re saving seeds though, you’ll want to leave those buds on the plant and let them go to flower.
After producing the little yellow flowers, which your neighborhood bees will love, the plant will start producing seed pods where the flowers used to be. Let the pods mature and dry slightly on the plant. Then, carefully remove the top part of the plant with the seed pods and place in a dry area where the pods can dry completely. Carefully remove the small seeds from the dry pods, place in an envelope, label and store.
Favorite heirloom varieties of kale for Northwest gardens: Nero di Toscana (also known as Dino, Lacinato or Tuscan) and Red Russian kale.
 Cilantro and coriander
Most people are surprised to learn that the spice, coriander, is just the dried seeds from the cilantro plant. You can cook with the tender cilantro leaves while the plant is young and then enjoy its seeds as a delicious dried spice. Saving cilantro/coriander seeds is simple! Just let the plant go through its flowering and seed-producing stages. Be warned – your diminutive cilantro plant will grow tall, up to 4 feet, when it goes to seed.
The big, bushy plant might need a little corralling, which you can easily provide by using some twine. Let the seeds dry on the plant – this means the entire plant will start turning brown and will look dead. Removing the seeds from the plant can be a time consuming process since they produce so many seeds. Sit, with a large bowl over the table or on your lap. Hold one of the stems over the bowl and run your thumb and forefinger, pinched lightly together, up the stem. The small seeds will fall into the bowl, which you can then transfer to an envelope or dry Mason jar.
Favorite heirloom cilantro for Northwest gardens: Slow Bolt cilantro
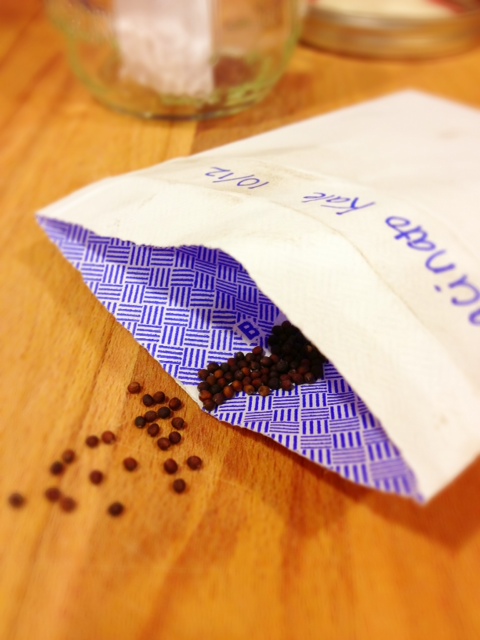
Best seed storage practices for families
 Once you save your seeds, you’ll want to take care of them over the winter so they’re ready when you want to sow them the following spring. To germinate, seeds need moisture and warmth, so in saving seeds we need to provide the opposite conditions. I keep my seeds in one of the crisper drawers in the refrigerator.
To prevent moisture from breaking the seeds dormancy, triggering them to grow, I use quart-sized mason jars for storage. I put smaller seeds, like kale and tomato, in envelopes before placing them in the jars. Larger seeds, like beans and peas, can go directly into the jars. For added protection, I drop in the moisture-wicking capsules that sometimes come with vitamins. While those aren’t necessary, they add a little extra moisture control.
Now that you’ve got the seed saving basics, you can get start growing your family’s favorite vegetables for years to come!
Stacy Brewer, teacher, urban farmer and self-proclaimed garden nerd, is committed to cooking with local and seasonal ingredients and growing as much food as she can in her modest Seattle yard. She covers gardening, preserving and crafting on her blog, Seattle Seedling. She's also the creator of SeattleUrbanFarmSchool.com